

Regular HVAC repairs and maintenance are essential to ensure that your heating, ventilation, and air conditioning system operates efficiently. Neglecting routine care can lead to poor performance, increased energy costs, and potential breakdowns. Below, we explore why consistent attention to your HVAC system is crucial.
Benefits of Regular HVAC Repairs
- A well-maintained HVAC system uses less energy to heat or cool your home. This translates into lower utility bills and a reduced carbon footprint.
- For instance, cleaning or replacing air filters regularly can improve airflow, allowing the system to work less strenuously.
- Addressing minor issues before they escalate prevents wear and tear on critical components.
- Routine servicing helps systems last several years longer than those left without care.
- Regular repairs ensure that your home remains at a comfortable temperature year-round.
- Proper maintenance also minimizes risks like uneven heating or cooling in different areas of the house.
- Proactive maintenance identifies potential failures early, preventing unexpected disruptions.
- This is particularly important during peak seasons (winter and summer) when the demand for HVAC systems is highest.
Signs Your HVAC System May Need Repairs
Being proactive about recognizing potential problems can save you time and money.
- Unusual noises such as rattling, banging, or squealing coming from the unit.
- Weak airflow from vents even when the system is running at full capacity.
- An unexplained increase in energy bills without changes in usage patterns.
- Inconsistent temperatures throughout your home.
- Frequent cycling (turning on and off) of the unit.
Preventative Maintenance Checklist
One way to avoid costly repairs is by adhering to a preventative maintenance schedule.
| Task | Frequency |
| Check and replace air filters | Monthly |
| Clean condenser coils | Annually |
| Inspect refrigerant levels | Annually |
| Tighten electrical connections | Biannually |
| Lubricate moving parts | Biannually |
| Test thermostat calibration | Annually |
Professional vs DIY Maintenance
- DIY Tasks:Replacing filters, clearing blocked vents, or cleaning exterior components like grills and ducts.
- Professional Repairs:Refrigerant handling, electrical wiring issues, motor replacements, or fan blade adjustments require certified technicians due to safety risks.
Regular repairs not only protect your investment but also ensure that you’re living comfortably while maintaining an energy-efficient household all year long. Always consult a licensed professional for significant repairs or inspections to keep your system running smoothly for years ahead.
How to Choose the Right HVAC Company Manassas, VA for Effective Refrigerant Line Repairs
Refrigerant lines are a crucial component of any HVAC system, as they facilitate the transfer of heat, which is essential for both heating and cooling your space. Understanding how these lines work and their importance can help homeowners identify potential issues early while also ensuring that repairs are handled effectively. This article explores the role of refrigerant lines, common problems associated with them, and tips for maintaining their functionality.
What Are Refrigerant Lines?
Refrigerant lines transport the refrigerant—a chemical compound that absorbs and releases heat—between the indoor evaporator coil and the outdoor condenser unit.
- Suction Line:The larger insulated line that carries low-pressure gas (refrigerant) from the evaporator coil to the compressor.
- Liquid Line:The thinner copper line that carries high-pressure liquid refrigerant back to the indoor unit.
These lines are integral to achieving consistent cooling or heating within your home.
Common Issues with Refrigerant Lines
Over time, refrigerant lines can develop problems due to wear and tear or improper installation.
- Caused by corrosion, poor connections, or physical damage.
- Leads to a loss of refrigerant efficiency and insufficient cooling/heating.
- Dirt, debris, or ice buildup inside the line can restrict refrigerant flow.
- Causes uneven temperatures and reduced system performance.
- Worn-out insulation on suction lines allows heat exchange with surrounding air.
- Reduces efficiency and increases energy consumption.
- Bent or crushed pipes can disrupt refrigerant flow.
- May lead to compressor failure over time.
Signs Your Refrigerant Lines May Need Attention
Recognizing warning signs early can save you from costly repairs later.
- Uneven cooling or heating throughout your home.
- Hissing sounds near your outdoor condenser unit (a potential sign of leaks).
- Higher-than-normal energy bills despite consistent usage.
- Ice buildup on suction lines or around other components of your AC unit.
- Weak airflow from vents.
If you notice any of these symptoms, schedule an inspection with a licensed HVAC technician promptly.
How Proper Maintenance Prevents Problems
Routine maintenance plays a vital role in keeping refrigerant lines functioning properly.
- Check Insulation:Inspect suction line insulation regularly for cracks or wear; replace it if necessary.
- Inspect for Visible Damage:Look for kinks or bends along exposed piping outside your home.
- Clean Surrounding Areas:Ensure there’s no debris near outdoor units that could damage pipes over time.
For more technical tasks such as checking for leaks or recharging refrigerants, always consult certified professionals to avoid further complications.
Table: Key Differences Between Suction Line & Liquid Line
| Feature | Suction Line | Liquid Line |
| Size | Larger diameter | Smaller diameter |
| Insulation | Yes | No |
| State of Refrigerant | Low-pressure gas | High-pressure liquid |
| Common Issues | Ice buildup; insulation wear | Leaks; blockages |
Maintaining efficient operations within your HVAC system is heavily dependent on ensuring that all components—including refrigerant lines—are functioning as intended. By understanding their importance and addressing issues promptly, you’ll prolong the lifespan of your system while ensuring optimal comfort year-round. Always rely on trained professionals for inspections and repairs to ensure safety and quality workmanship.

Importance of Refrigerant Lines in Air Conditioning Repair Manassas, VA
Refrigerant lines play a crucial role in the functionality of your HVAC system, ensuring efficient cooling and heating throughout your home or building. Proper maintenance and repair of these lines are essential to keep your system operating at peak performance. Let’s dive into the importance of refrigerant lines, common problems they face, and how to address these issues effectively.
What Are Refrigerant Lines?
Refrigerant lines are critical components in an HVAC system that transport refrigerant between the indoor evaporator coil and the outdoor condenser unit.
- Suction Line (Low-Pressure Line): This carries refrigerant gas back to the compressor after it absorbs heat indoors.
- Liquid Line (High-Pressure Line): This transports liquid refrigerant from the compressor to the evaporator coil for cooling purposes.
Both lines need to be properly insulated and maintained to ensure efficient temperature control and avoid energy waste.
Common Problems with Refrigerant Lines
Over time, refrigerant lines can develop issues that impact your HVAC system’s performance.
- Refrigerant Leaks: Small cracks or pinholes in the line can cause refrigerant to escape, reducing cooling efficiency.
- Damaged Insulation: The insulation surrounding suction lines can deteriorate due to age or weather exposure, leading to energy loss.
- Clogs or Blockages: Dirt, debris, or ice buildup can obstruct the flow of refrigerants within the line.
- Corrosion: Exposure to moisture or contaminants may result in corroded pipes that weaken over time.
Signs Your Refrigerant Lines Need Attention
- Inconsistent Cooling/Heating– Uneven temperatures across rooms could indicate a problem with your refrigerant levels.
- Hissing Sounds– A sign that there might be a leak somewhere along the line.
- Frost Buildup on Lines– Ice forming on suction pipes could point toward insulation failure or low refrigerant levels.
- Increased Energy Bills– A struggling system often works harder than necessary due to improper refrigerant flow.
Steps for Effective Repair
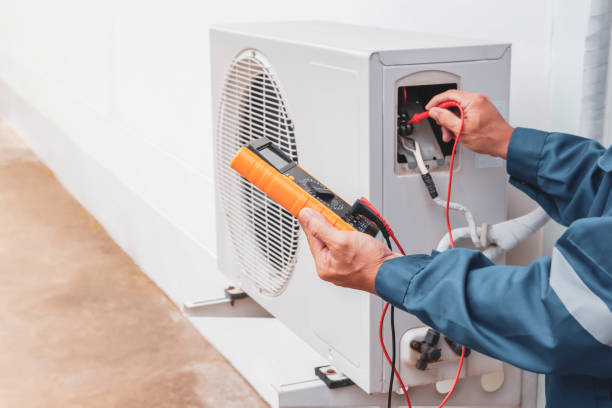
- Use a detection tool (such as an electronic leak detector) to locate leaks.
- Seal minor leaks with an appropriate sealant; replace sections with extensive damage.
- Replace worn-out insulation materials on suction lines using foam pipe sleeves.
- Ensure tight seals around joints for maximum energy retention.
- Flush blockages from clogged liquid or suction pipes using professional-grade cleaning solutions if necessary.
- After repairing leaks, ensure proper recharging by adding manufacturer-recommended levels of coolant into your system.
Preventative Measures for Long-Term Performance
- Schedule annual maintenance checks with a certified technician.
- Regularly inspect visible portions of both suction and liquid lines for damage.
- Avoid overloading your HVAC unit by ensuring proper thermostat settings.
By staying proactive about inspecting and maintaining your HVAC’s refrigerant lines, you’ll improve overall efficiency while reducing long-term repair costs associated with neglecting this vital component.
Essential Tips from an AC Service Company Manassas, VA for Preventing HVAC Clogs and Improving Efficiency
Clogs in your HVAC system can significantly diminish its efficiency, lead to increased energy bills, and strain the system’s components. Addressing these blockages promptly is critical to maintaining the performance and longevity of your heating and cooling system. Below are the key steps you can take to identify, address, and prevent clogs in your HVAC system.
Signs of Clogs in Your HVAC System
Detecting blockages early can save time, money, and potential damage.
- Reduced Airflow:A noticeable reduction in airflow from vents is often caused by clogged ducts or filters.
- Inconsistent Temperatures:Uneven heating or cooling within different areas of your home may point to a blockage.
- Unusual Noises:Strange sounds such as whistling or banging could indicate air trying to pass through obstructions.
- Higher Energy Bills:If clogs are forcing your system to work harder than normal, you’ll likely notice an increase in energy use.
Steps to Remove Clogs Effectively
- Dirty or clogged air filters are one of the most common sources of reduced airflow.
- Remove and inspect filters regularly (typically every 1-3 months). Replace them as needed with high-quality filters recommended for your unit.
- Use a vacuum with a long hose extension to clean duct interiors if accessible.
- For extensive blockages or contamination (e. g. , mold), consult a professional duct cleaning service.
- Clogged drain lines can inhibit proper moisture removal from the air.
- Use a wet/dry vacuum on the outside condensate line opening or flush it with distilled vinegar periodically.
- Leaves, dirt, grass clippings, or other obstructions near outdoor units can clog ventilation fins.
- Clear debris around the unit regularly using gloves or soft brushes for hard-to-reach areas.
- Ensure all vents and registers are open and not obstructed by furniture or rugs.
- Clean grilles with a damp cloth to remove dust buildup that might hinder airflow.
Preventative Measures for Future Efficiency
- Schedule professional maintenance twice a year (spring & fall) for thorough cleaning and tune-ups.
- Replace air filters more frequently during peak usage seasons (summer & winter).
- Install programmable thermostats to minimize strain on your system during non-essential hours.
| Component | Frequency of Maintenance Required | Recommended Action |
| Air Filters | Every 1–3 months | Replace |
| Ductwork | Every 2–5 years | Inspect/Clean professionally |
| Condensate Drain | Every 6 months | Flush with distilled vinegar |
| Outdoor Unit Fins | Monthly during warm seasons | Clear debris |
By following these steps consistently and addressing any signs of clogs immediately, you can ensure better efficiency from your HVAC system while reducing unnecessary wear on its components over time.
The Critical Role Fan Blades Play in HVAC Functionality and When They Require Repair
Fan blades are an integral component of any HVAC system, playing a critical role in ensuring proper airflow and maintaining the overall efficiency of the unit. When functioning correctly, they contribute to the distribution of warm or cool air throughout your home or workspace. However, damaged or malfunctioning fan blades can lead to significant performance issues, increased energy costs, and even total system breakdowns. Understanding the importance of fan blades and recognizing when they require repair is essential for maintaining your HVAC system.
Importance of Fan Blades in HVAC Systems
Fan blades are responsible for:
– Efficient Air Distribution: They circulate air evenly to maintain consistent temperatures across all areas.
– System Cooling: In outdoor units, fan blades help dissipate heat from the condenser coils to prevent overheating.
– Energy Efficiency: Properly functioning fan blades reduce strain on the system, lowering energy consumption.
By ensuring that your fan blades are in optimal condition, you can avoid unnecessary wear and tear on other components within your HVAC unit.
Signs Your Fan Blades May Need Repair
Damaged or failing fan blades often exhibit warning signs before causing severe problems.
- Unusual Noises: Loud clanking or banging noises may indicate misaligned or broken fan blades striking other components inside the unit.
- Reduced Airflow: If you notice weaker airflow from vents despite running at full capacity, the issue could stem from bent or obstructed fan blades.
- Inconsistent Temperatures: Uneven heating or cooling across rooms might be caused by improperly circulating air due to damaged blades.
- Visible Damage: Cracks, bends, or debris buildup on the blade surface can compromise efficiency and lead to motor strain over time.
Addressing these issues early can prevent more extensive damage throughout your system.
Common Causes of Fan Blade Problems
Several factors can contribute to problems with HVAC fan blades.
- Debris Accumulation: Dirt, leaves, and other debris entering the outdoor unit can damage blade edges or cause imbalance.
- Wear and Tear Over Time: Prolonged use may cause natural deterioration of materials.
- Improper Installation: Incorrect installation during repairs could result in misalignment.
- Corrosion in Outdoor Units: Exposure to weather elements over time can weaken metallic components like fan blades.
Routine inspection and maintenance play a key role in preventing these issues from escalating.
Repair vs Replacement
| Factor | Recommendation |
| Minor bends | Opt for repair |
| Cracks near attachment points | Replace damaged blade |
| Severe corrosion | Replace entire set |
| Misalignment due to wear | Often requires replacement |
For professional advice tailored to your specific circumstances, consult an experienced technician who understands your model’s requirements.
Preventive Measures for Maintaining Fan Blades
To extend the lifespan of your HVAC’s fan blades and avoid frequent repairs: – Schedule regular professional maintenance checks at least twice a year. – Clean debris from outdoor units regularly using a soft brush. – Monitor unusual sounds during operation as early warning signals. – Ensure clearances around outdoor units remain unobstructed by plants or objects.
By implementing preventive care measures alongside timely repairs when necessary, you’ll ensure reliable performance and long-term savings for your HVAC system without compromising comfort levels at home or workspaces alike.
Essential Tips to Ensure Your Home’s Airflow is Balanced After HVAC Repairs
Maintaining proper airflow in your home after HVAC repairs is critical to ensuring efficient operation and a comfortable indoor environment. Imbalanced airflow can lead to uneven cooling or heating, higher energy bills, and potential strain on your HVAC system. This guide will provide actionable tips to help you achieve balanced airflow throughout your home following repairs.
Inspect the Vents and Registers
After an HVAC repair, it’s important to ensure that all vents and registers are open and unobstructed. Blocked or closed vents can disrupt airflow, causing hot or cold spots in certain areas of your home.
- Check for blockages:Remove dust, debris, or furniture that may be blocking airflow.
- Ensure proper positioning:Keep furniture at least a few feet away from vents for optimal circulation.
- Clean regularly:Dust and vacuum vents frequently to prevent buildup that can restrict airflow.
Verify Ductwork Integrity
- Inspect for leaks:Look for visible holes or cracks in the duct system.
- Seal gaps:Use aluminum tape or mastic sealant to cover leaks effectively.
- Contact a professional:If the damage is extensive, consult an HVAC technician for more thorough duct repairs or replacements.
| Common Duct Issues | Potential Effects | Solution |
| Leaks | Uneven temperatures | Seal with mastic/tape |
| Crushed sections | Reduced overall airflow | Replace damaged ducts |
| Dirt buildup | Air quality deterioration | Schedule duct cleaning |
Adjust Damper Settings
Adjusting these dampers post-repair can help create a more uniform temperature distribution across rooms.
- Adjust each damper slightly until you achieve consistent comfort levels in all spaces.
- Avoid closing off any damper entirely, as this could strain your system.
Conduct an Airflow Test
Performing an airflow check is another practical way to identify imbalances after repairs.
- Place a piece of lightweight tissue paper near each vent while the system is running.
- Observe which areas have weaker or stronger air movement.
- Use this information to make further adjustments (such as opening/closing vent grilles slightly) or consult a professional if necessary.
Don’t Overlook Your Air Filter
Air filters play a significant role in maintaining balanced airflow within your home. A clogged filter can restrict circulation and cause pressure imbalances throughout the system.
- Replace filters regularly (typically every 1–3 months depending on usage).
- Choose filters with an appropriate MERV rating recommended by your manufacturer.
- Monitor filter cleanliness more frequently if you live in dusty environments or have pets at home.
Schedule Regular Maintenance
- Annual inspections by a trained technician.
- Tune-ups before peak heating/cooling seasons.
- Periodic checks for wear-and-tear components like fan motors and belts that could impact overall comfort levels inside your living space.
Balanced air circulation isn’t just about comfort—it also helps extend the life of your HVAC unit while reducing energy waste over time. Implement these strategies consistently for optimal results after any repair work has been completed.
- Top Signs That Indicate Your Air Conditioner Needs Immediate Repair by an HVAC Company in Manassas, VA
- Finding a Reliable HVAC Company Manassas, VA for Your Home System Repairs
- Ensuring Optimal Performance with Regular Manassas AC Repair
- Reliable Manassas AC Repair for Your Heating and Cooling Needs
- How to Choose the Best Manassas AC Repair Service for Your Business Needs
- How to Identify When You Need Air Conditioning Repair Manassas, VA
- Key Signs That Your HVAC System Needs Repair from a Trusted HVAC Company Manassas, VA